Showing posts with label mac. Show all posts

Friday, February 23, 2018

EOTD: Frost

Every once in a while I get really inspired. It can be by nature, like when I see a sunset I like to create a similar look using yellow and orange eyeshadows.
I can get inspired by buildings, or by things I see on instagram.
I've been wanting to do a very bright, colourful look for a long time now. I have a gorgeous blue liquid eyeliner in my drawer that I can't use on a daily basis so I decided to do a look with this one. I used to be scared of pink and then I started doing a lot of pink looks. It's been ages since I've done anything with any blue eyeshadow, so I thought this would be a nice change for once.


The blue eyeshadow that I used is from a new Zoeva palette that I'm testing. I'm also using the blue eyeshadow from my Fenty Beauty Galaxy palette.
Probably my favourite product in this whole look is the MAC pigment that I used on my eyelid. It's called "Blue Brown" and it's a taupe with some blue sparkles in it.
So pretty - and you can make it wearable! 


Would you like to see more of these fun looks?

Saturday, December 9, 2017

MAC 15 X Warm Neutral palette review

Hey guys! A while back I told you that when I travel and I see a Sephora, I like to take some make-up items home that normally I don't get to buy.
When I got back from Malaga, I had so many items to review and then I went to Portugal about a month after and got even more stuff. 
Needless to say, some of the items haven't been reviewed yet and I thought today would be a nice day to catch up on that.

The palette that I'm reviewing today is the MAC 15X Warm Neutral palette. This palette holds 15 eyeshadows that MAC has picked out for this certain palette. The pans are the size of the singles that you can get in the store.

I think this palette looks so good. There are so many different shades and textures. Some matt, some shimmery. I think this is a perfect everyday palette, good for both neutral and more eyecatching looks.


Here you can see the swatches. This first picture contains the swatches of the first row. The lighter colours are well pigmented. A bit powdery but that's it. The black-ish colour isn't pigmented very well.


The second row is well pigmented as well. Especially the gold (called "Amber lights", which I own in a single eyeshadow as well) is very pigmented, but if you pay attention to the highlight colours near my hand, you'll see that those are quite nice as well. 
They just don't show up on my skin that much because the colours of the eyeshadows and my skin are nearly thesame.


And the third row is probably my favourite. There are a few yellows and a very beautiful green eyeshadow.


I decided to work mostly with the colours from the third row. I applied a brown eyeshadow in my crease and blended out and decided to darken it up a little bit more with the black eyeshadow. It might not be very pigmented in the swatch, but it did work quite well on the eyes. I had no problems applying or blending it whatsoever.
I used the yellow "Lemon Tarte" in my inner corner, the gold in the middle and the green on the outer corner.


And this is what the end result looks like. I'm very satisfied with this palette.


I hope you have a really good day! 
Let me know what you think and I'll see you soon! 


Thursday, December 7, 2017

EOTD: Red Halo

Goodmorning everyone! Here I am again and this time I have a bit of a special look for you!
The look that I am wearing today is a little out of my comfort zone, it's based on orange and red eyeshadows.
I have said it before on this blog and I'll say it again: red eyeshadows can be very intimidating and can make you look sick or like you've just cried in no-time.

These past few months I've started to appreciate oranges and reds a lot more.
The look that I made today is a "halo" look - this means that you have darker colours on the in- and outside of your eyelids and a lighter colour in the center.
This technique makes your eyes look bigger and brighter, which is really nice if you have small eyes.


I started by working a tan eyeshadow from Urban Decay's Naked Heat palette into my crease and blending it out.
Then, I put "Red Brick" by MAC in my crease, inner- and outer corner. This is a really bright orange, matt eyeshadow colour. Next, I darkened things up with the shimmery red "Ruddy" eyeshadow (also by MAC).

Fenty Beauty "Trophy Wife" - MAC "Ruddy" - MAC "Red Brick" - Urban Decay Naked Heat "Sauced"

Because the Fenty Beauty "Trophy Wife" highlighter is a little bit too dark for me during the wintertime, I decided to put it on the middle of my eyelid, the part that I had left blank.
I carefully blended this in with "Red Brick", going back and forth between the two colours.


After that I went in with my H&M gel eyeliner and my trusty old Essence liquid ink eyeliner. I put a little highlight by Kat Von D in my inner corner, et voilĂ !

If there are any products in this post that you are curious about, please find them below. You can simply click the link to find the review of the certain product.

Tuesday, October 17, 2017

MAC Burgundy Times Nine palette review

Good morning everyone and welcome to one of these reviews that I have been most excited about this whole week.

Today I'm reviewing a pre-made MAC eyeshadow palette for you, called "Nine times Burgundy".
You probably guessed it, this palette is a palette that holds nine burgundy shades. This is the first time that I have seen the pre-made palettes and needless to say, I wanted one! 


A palette like this is really great because the eyeshadows are smaller than regular ones. So you get a small palette with small eyeshadows, which to me would ben great if you're just starting out and you'd like to try MAC but you don't want to spend half of your paycheck.

I didn't realise I already owned a lot of eyeshadows in this palette. Popular shades like Honey Lust, Star Violet, Sketch, Antiqued are a part of this palette. There are a few mattes and a couple of shimmery shades, I really like this combination. The balance between light and dark shades is quite good too!


I don't like to admit it, but I had higher hopes for this palette. Alright, I've only used it a couple of times up until now and maybe I'll fall in love with it later, but right now I'm not impressed.

The look that I made was difficult to blend out and the fall out was immense. I understand with darker colours comes more fall out, but I feel like every colour in the palette left a stain. Maybe it was the combination that I chose.
 Blending all these eyeshadows together was a bit difficult too. I'm not used to that from MAC.


Below you can see some more close-up looks. I'm not completely satisfied with how this turned out. But I'm willing to give this palette another shot and I'll let you know if my opinion changes.


Thanks for reading!
Have a lovely day!


Friday, October 13, 2017

EOTD: Mermaid in disguise

Good morning everyone!
I'm feeling a little bit mermaid-y today. The last few good summer days are coming up so I'm taking my chances and going for bright eyes each and everyday!


Today, I'm combining a neutral look (created with my MAC Nine Times Burgundy palette, which I have a review coming up on soon) - with my glam eyeliner by NYX.

I created a cut crease, something that I don't do often but I like it because everytime you look down it's an extra pop of colour, something you wouldn't expect, which I like.
This eyeliner is green but looks like a teal eyeliner in these particular pictures. I like!


What do you think of this eyelook?
Let me know in the comments below or join me on Facebook and Instagram
 

Monday, September 4, 2017

MAC "Copper Sparkle" pigment review

Gooooodmorning! 


Recently I got a sample of a copper pigment at my local MAC counter. The make-up artist gave it to me because I didn't want to buy a whole pigment if I wasn't sure I would like it, but after using the pigment twice, I fell in love with it and decided that maybe I would be willing to pay €23 for it.
The pigment that I'm talking about is called "Copper Sparkle". This is what it looks like.


I have used pigment from MAC before and I have always been happy with the way they turned out. The previous ones I got weren't as bright as this pigment though and I must admit that I didn't expect the colour to pop like it did. Below you can see a swatch.


Pigments always give fall out so it's smarter to do your eye make-up before your face make-up when you use a pigment. That way, you can remove the fall out from your face before starting to apply foundation. If you did however already do your face make-up and find yourself in a bit of a pickle, use scotch tape to remove the fall out.
I always make sure the pigment has something to stick to so I got a glitter glue (by H&M). You can also use foundation, concealer or eyeshadow primer.


Here's my completed look with the "Copper Sparkle" pigment. I'm very impressed!
I hope you enjoyed today's post! Have a good one!

Tuesday, August 22, 2017

EOTD: Orange

Goodmorning everyone! I'm glad you're here again.
Today's look is a look that I created with the new MAC products I got earlier this week. I was so excited to play with all my new colours because I picked out colours that I don't have in my collection yet. I figured if I'm going to spend a lot of money on make-up, I might as well go for something special. I never really go for neutral shades or highlight colours because there are plenty of other brands (and cheaper ones) that make them too and they're just fine.
 
This look is so easy but looks like you've put a lot of effort into it.
For today's look I used the "Suspiciously sweet" and "Red brick" in my crease. I darkened up my crease with "Swiss Chocolate".
For my eyelid, I used a sample of the "Copper spark" pigment that the MAC make-up artist made for me. It's absolutely gorgeous!
 
Here are some close-ups of the look that I made:
 
 
And this is what the full face looks like. I did end up applying some gel eyeliner to my lower waterline to get more of the "smokey eye" effect. My eyeliner and mascara are by Essence, still, after all these years.
 
 
Thanks a lot for reading! Have a good one!


Sunday, August 20, 2017

NEW IN: MAC

Goodmorning everyone!
How have you been? For the first time in a long time, I have finally had the chance to spend some time at my local MAC store and treated myself to a couple of new eyeshadows.


I'm not brand loyal to most brands (I'll try out pretty much anything that looks good to me), but I prefer some products from certain brands. MAC, for example, is the brand that I like eyeshadows from. Not all of them are equally pigmented but the ones that are, blow you away.
The red and copper eyeshadows have been trending for a while now and I decided to get some more bright, vibrant oranges and reds that are unlike any other in my make-up collection.
Let's have a look!


One of the eyeshadows I got is "Amber Lights". I have purchased this one before but I accidentally dropped my palette and this eyeshadow broke completely (and with it, my heart broke as well).
This is just such a pigmented and vibrant gold, I love it!


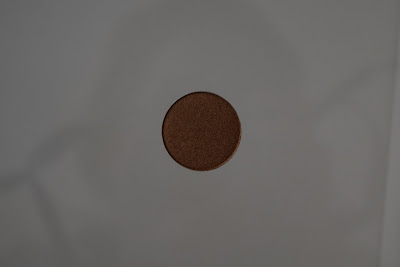
Next I got two orange eyeshadows. I already have a copper MAC eyeshadow called "Coppering" and also a orange toned one called "Texture", but these ones are even more 'extreme'. "Suspiciously sweet" looks a little bit like their eyeshadow "Paradisco", but is more pigmented and is a little bit more orange.


This next eyeshadow is an eyeshadow that is a very very bright orange. It almost looks like a red. I got this one because I heard so many good things about this colour and various people recommended it to me.


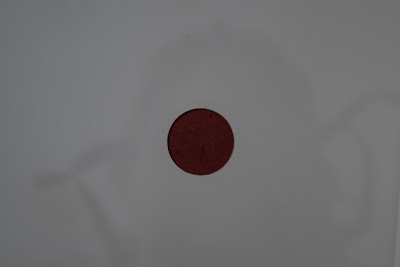
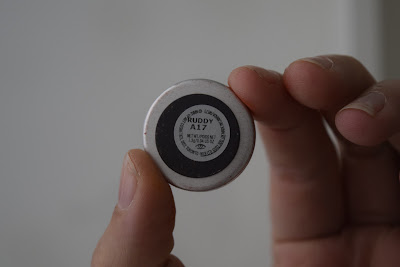
My next eyeshadow, "Ruddy" is a beautiful red sparkly eyeshadow. Unfortunately this one was a little damaged when I got it, but it's so so beautiful!


Last but not least I also got two darker colours, they are called "Antiqued" and "Swiss Chocolate".


I will have some make-up looks soon using these eyeshadows. I'm so excited and can't wait to hear your opinions on it!


Have a lovely Sunday! See you soon!

Wednesday, March 8, 2017

MAC face off: Dark Side vs. Diva

I'm a typical girly girl. Sure, I like different colours than pink and no I'm not scared of cracking my nails - but I enjoy doing girly things as well. I like doing my make-up and dressing up. I love hanging out with friends to have a dinner party or watch a movie.
 One of the things I love about my friends is talking about make-up (and of course my friends support my blog which is really great).

One of the bigger subjects in the group was the MAC "Diva" lipstick. I had quite some trouble getting my hands on the beautiful and wildly popular item. 
I got "Dark Side" instead - another MAC colour - that is almost identical to Diva. Today I'm reviewing and comparing them for you. Just in case you're looking for a dupe :).


Both of the lipsticks are in the regular collection, but the chance of you getting your hands on "Dark Side" is much bigger.
Dark Side is pretty much the exact same colour as "Diva", but there is some sheen in the lipstick. Whereas "Diva" is completely matte (and therefore a little more dry). That's really the only difference.

Below you can see some swatches of the two lipsticks. The left one is "Dark Side" and the right one is "Diva".


Have a lovely day and I'll see you soon!

Saturday, March 4, 2017

EOTD: Eyepoppin'

Hi everyone!
I'm finally back with an "eye of the day". It's been quite a while since I've experimented with eye make-up, but today I had some extra time and I was feeling in the mood for something a little different. I created a look that is completely based on warm colours such as red, orange, copper and gold.


I used my Too Face natural eye palette to create shadows in my crease. I started with "Cashmere bunny" from inner to outer corner and then darkened the look with "Erotica" and "Sexpresso". Click here to read my review and see swatches of the eyeshadows that I'm talking about.


Next I mixed "Texture" and "Coppering" by MAC and applied that onto my eyelid. Because I'm using a lot of copper shades, I decided to go for eyeliner on the upper lashline as well as the waterline. Using reds or copper tones can make you look sick very easily and black eyeliner helps neutralize that.


Afterwards I also applied some gold eyeliner on top of the black eyeliner to give the look some extra "pop". The eyeliner that I used was from a limited edition by Essence. (Click here for the review and more pictures).

Below you can see what the full face looks like! 


What do you think?
Have a nice day!